

$34 USD
Looking for an easy way to create circular shaped pockets, reliefs or inlays in your wood projects? Look no further than the "Ultimate Circle Router Template Set".
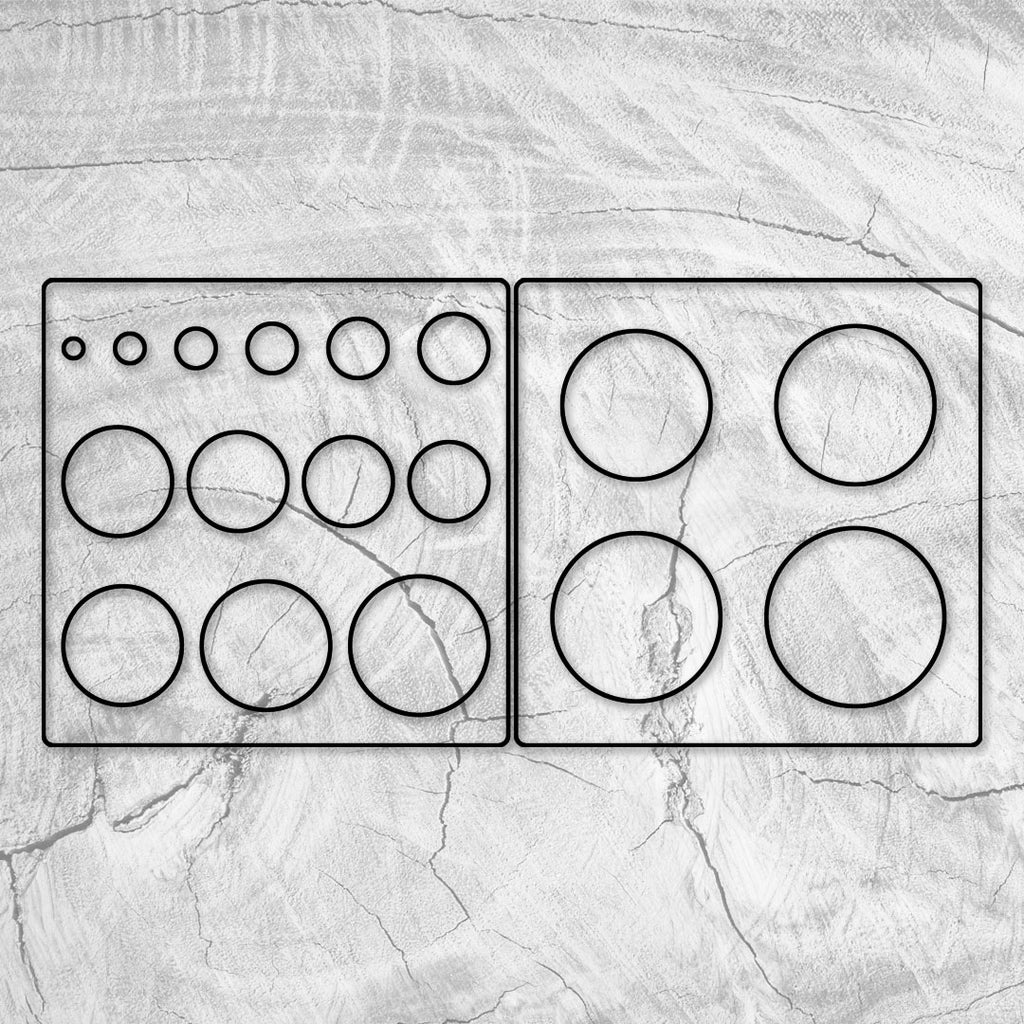
This set consists of TWO 11.75x11.75" templates that contain circles ranging from 0.5 to 4.5 at 0.25" (1/4") increments: 0.5", 0.75", 1.0", 1.25", 1.5", 1.75", 2.0", 2.25", 2.5", 2.75", 3.0", 3.25", 3.5", 3.75", 4.0", 4.25", 4.5".
Perfect for creating round pockets to recess hardware, or to create wood or resin inlays.
Each circle on the templates has the diameter clearly marked as well as a corresponding crosshair engraving so you can easily align the template to the center of the circle you wish to shape.
For Backfilled Resin Inlays:
If you simply want to create a decorative epoxy resin inlay in your material, use any standard flush trim or inlay router bit. Hollow out your pocket to the desired depth with your handheld router, backfill with resin, then sand or plane flush.
For Creating Wood Inlays (Male / Female):
Our inlay templates are compatible with most router inlay bit kits. Our favorite inlay bit kit is the Whiteside Machine 9500 1/8" solid brass inlay kit, but nearly any inlay specific router bit can be used. The unique design of these kits allows you to use the same bit, with an offset bearing, to cut the pocket (the female part to receive the wood inlay), then remove the bearing, shape the insert (male part) out of a different piece, then mate them together for a perfect (or near perfect) fit. Highland Woodworking has a great YouTube video demonstrating on how this inlay router bit works with inlay templates here.
The Crafted Elements line of laser cut acrylic router templates are precision cut templates designed especially for woodworkers. Unless you have access to a CNC machine in your shop these templates are the easiest, most accurate and most repeatable way to shape wood and wood+resin pieces into things like charcuterie boards, serving trays, handles, functional art and more.
Like our line of maker molds, we designed these templates to save you time and boost production efficiency. These take the guesswork out of shaping and fabricating. By simply pulling one of these clear templates off the shelf and lining it up on your material you’ll instantly know how your final piece will look before you even start cutting and shaping.
We laser cut all of our templates out of long lasting and durable 1/4” thick cast acrylic to ensure the bearing on your router bit has enough surface area to glide on. These templates can be used over and over and will quickly become a go-to tool in your shop.
Reduce errors, inaccuracy and problems with making complex shapes perfectly symmetrical. We even have templates to match many of our awkwardly shaped silicone molds, so you can cut and shape pieces of wood to fit perfectly snug within our molds before you pour your resin.
All you need is a template, flush trim router bit (like this one) and a router table. Even the most basic routers are capable of shaping materials up to 1.5” thick.
Using our templates is easy:
We also have a full tutorial on our YouTube channel which you can find posted below: